|
USB cables by connector (Compatibility table)
USB A USB Mini-A USB Micro-A USB B USB Mini-B USB Micro-B USB 3.0 Micro-B USB-C USB cables by power carrying capability Low-power SuperSpeed: 100 mA 5 V 0.50 W Low-power SuperSpeed: 150 mA 5 V 0.75 W USB 3.0 High-power: 500 mA 5 V 2.5 W High-power SuperSpeed: 900 mA 5 V 4.5 W USB 3.0 Multi-lane SuperSpeed: 1.5 A 5 V 7.5 W USB 3.2 Gen x2 Battery Charging 1.2: 1.5 A 5 V 7.5 W USB-C (multi-lane): 1.5 A 5 V 7.5 W USB-C (multi-lane): 3 A 5 V 15 W Power Delivery 1.0/2.0/3.0: 5 A 20 V 100 W Type-C Power Delivery 3.1: 5 A 48 V 240 W Type-C USB cables by data carrying capability USB 2.0: 480Mbp/s USB 3.2 Gen 1 single lane: 5 Gbit/s USB 3.2 Gen 1 dual lane: 10 Gbit/s USB 3.2 Gen 2 single lane: 10 Gbit/s USB 3.2 Gen 2 dual lane: 20 Gbit/s USB4 Gen 2 single lane: 10 Gbit/s USB4 Gen 2 dual lane: 20 Gbit/s USB4 Gen 3 single lane: 20 Gbit/s USB4 Gen 3 dual lane: 40 Gbit/s USB4 Gen 4 symmetric: 80 Gbit/s USB4 Gen 4 asymmetric: 120 Gbit/s USB cables by role Active: They include integrated circuits (chips) that boost or improve the signal (usually in order to make the signals go further on a longer cable than without that active component) Passive: They do not include any chip to boost the signal
0 Comments
The reason boot.win doesn’t boot is because the Dells are too new and missing network drivers. 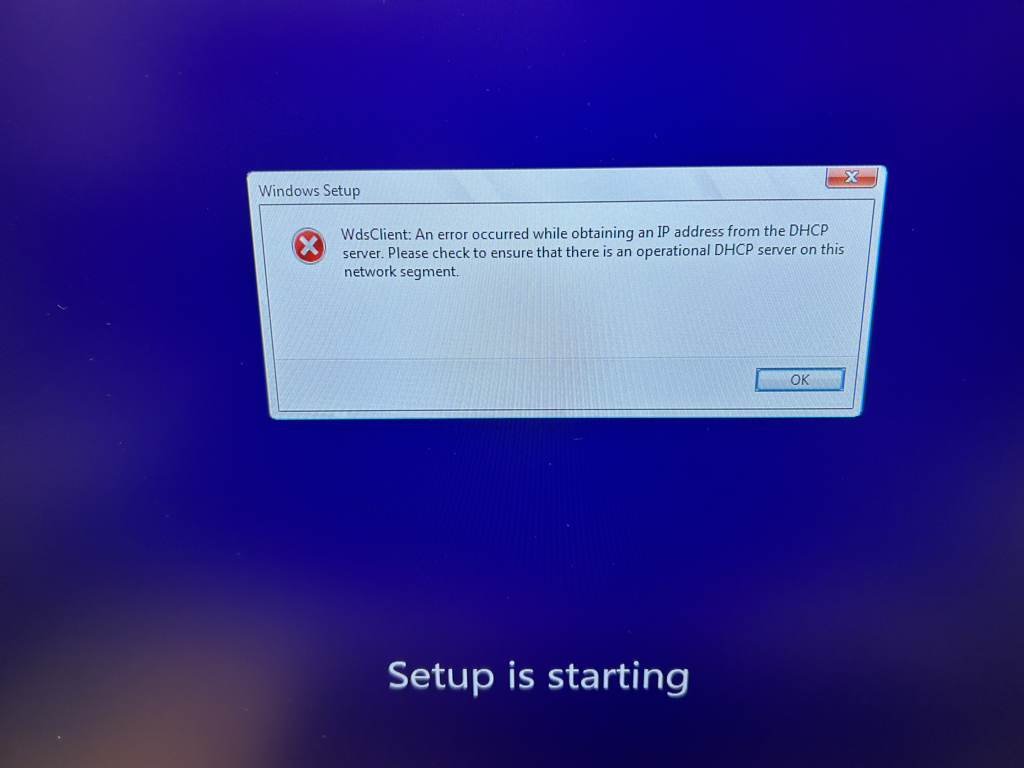 Solution: install the following network drivers from https://www.dell.com/support/kbdoc/en-us/000109842/dell-command-deploy-driver-packs-for-precision-models 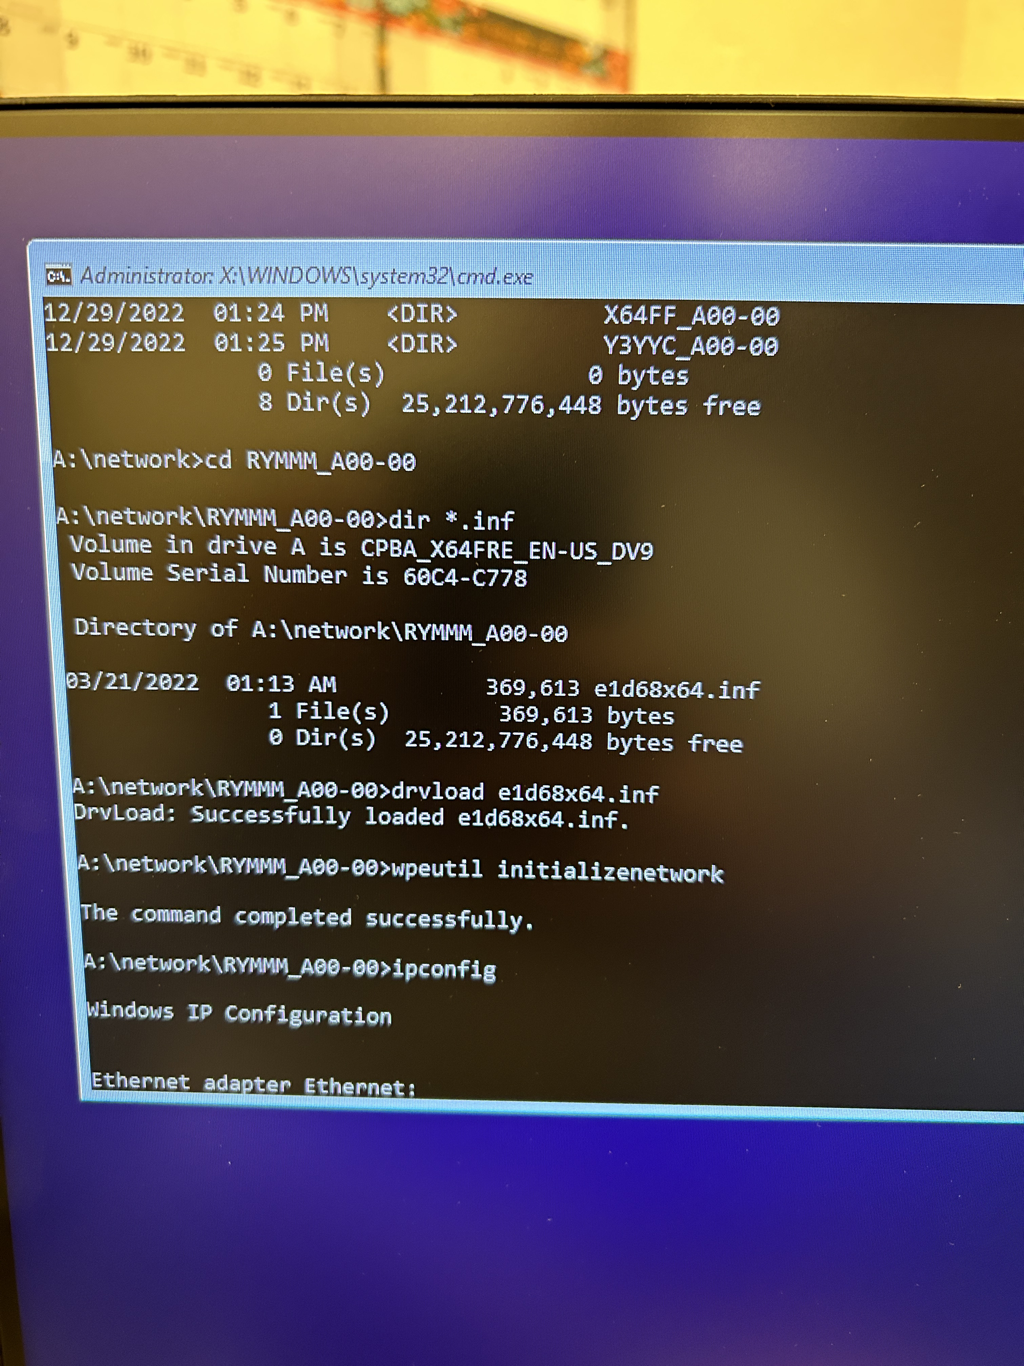 Very important: after adding three drivers in wds, and enabling them, do not forget to right click on the boot image and add the drivers there, so the boot image to rebuild including the network drivers.
Close Outlook 365.
Go to folder
Start Outlook 365. Make sure when you are using MFA, you are using MS Authenticator for confirmation, not SMS code. If you use SMS code to confirm MFA, you'll end up with the same problem. LG LRDCS2603S /00: How can I take out the pin from the fridge door bottom hinge for reversal?3/25/2022 I recently purchased an LG Fridge (Model LRDCS2603S/00) and am attempting to reverse the door (so it opens from right to left instead of left to right). I have been following along in the manual how to do so and have come to a snag. When attempting to switch the center assembly hinge, I am unable to loosen the pin. The manual says Use a 1/4 in. hex socket wrench to loosen the hinge pin (1) and remove it. See the image of the step: 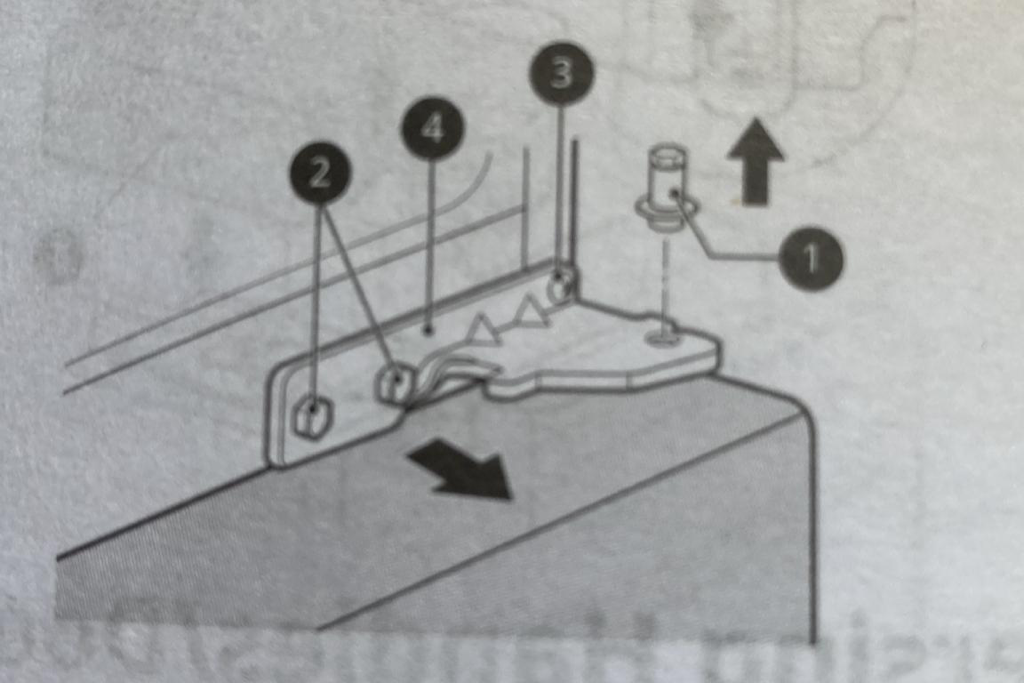 But when I attempt to do so, it doesn't budge at all - not even a turn or anything. I attempted a normal hex screwdriver, a socket wrench, and I even used my drill with 1/4 in. attachment - I ended up marring the pin head so bad it was no longer able to be grabbed with the wrench. I decided to purchase a new assembly thinking there was something wrong with my part, but the new one has the same issue. Here is an image of my new part: 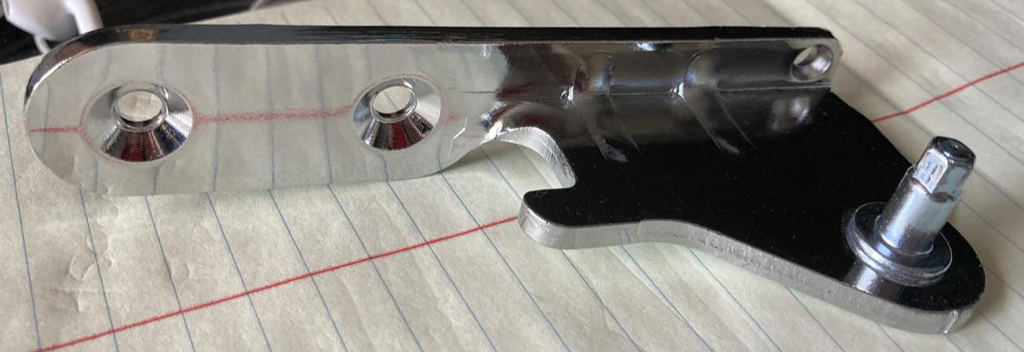 Has anyone gotten past this issue before and have suggestions on how to proceed? I know links are frowned upon, but if it helps, here is the link to the refrigerator owner's manual and a youtube videoshowing how it is done. EDIT As per requested by Criggie, here is a view from the underside: 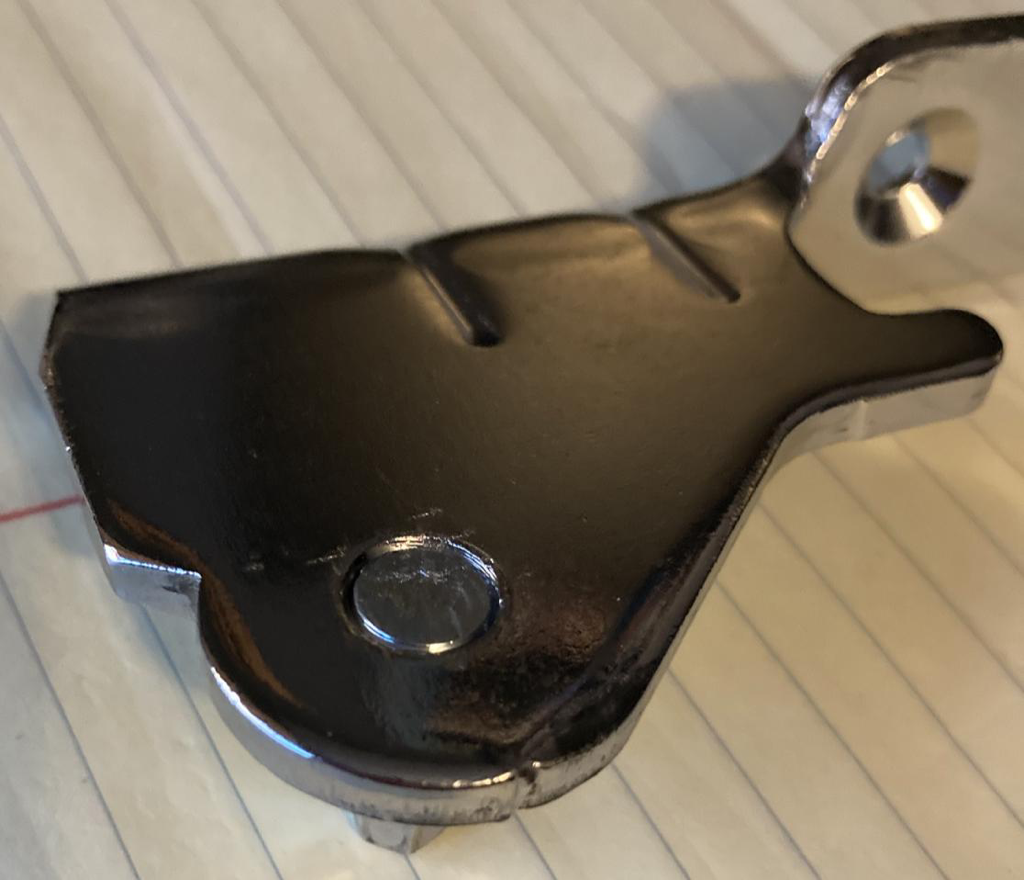 And a close up of the pin (the little marks around it are where I was trying to hit at it with a hammer and flathead): 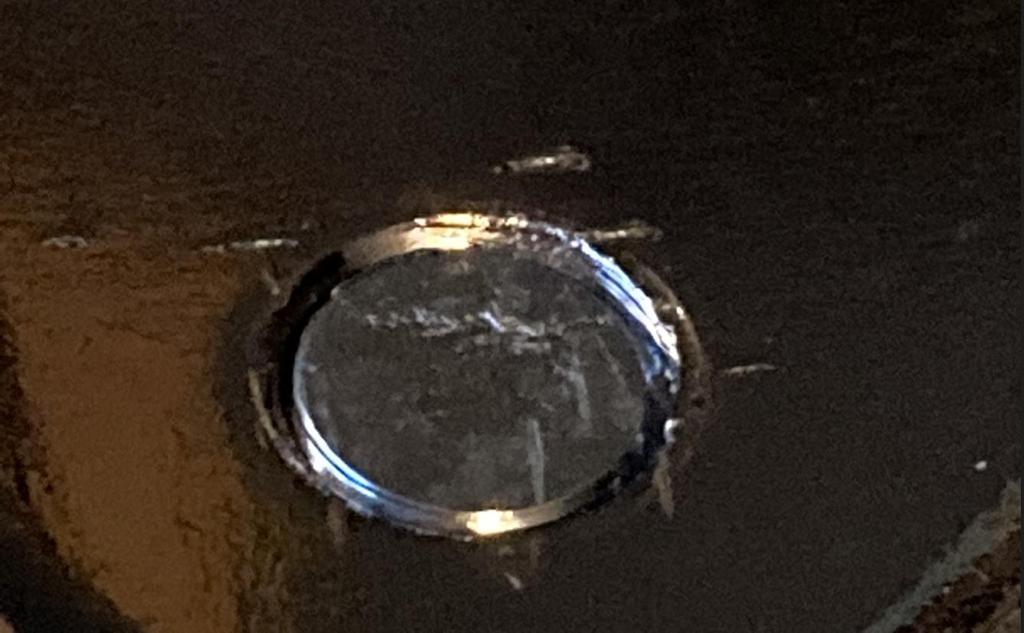 And the answer is …It took me a new bottom hinge ($40 from LG’s website, p/n AEH75957701 Center Hinge Assembly) to learn how. Simply make sure your 1/4” hex range goes all the way in the hinge’s pin and unscrew it as a regular screw. That’s all. On the photo is my original hinge which I managed to unscrew with an ease, after I knew what to do. The manual has to read “unscrewed like a regular screw” instead of “loosen”. 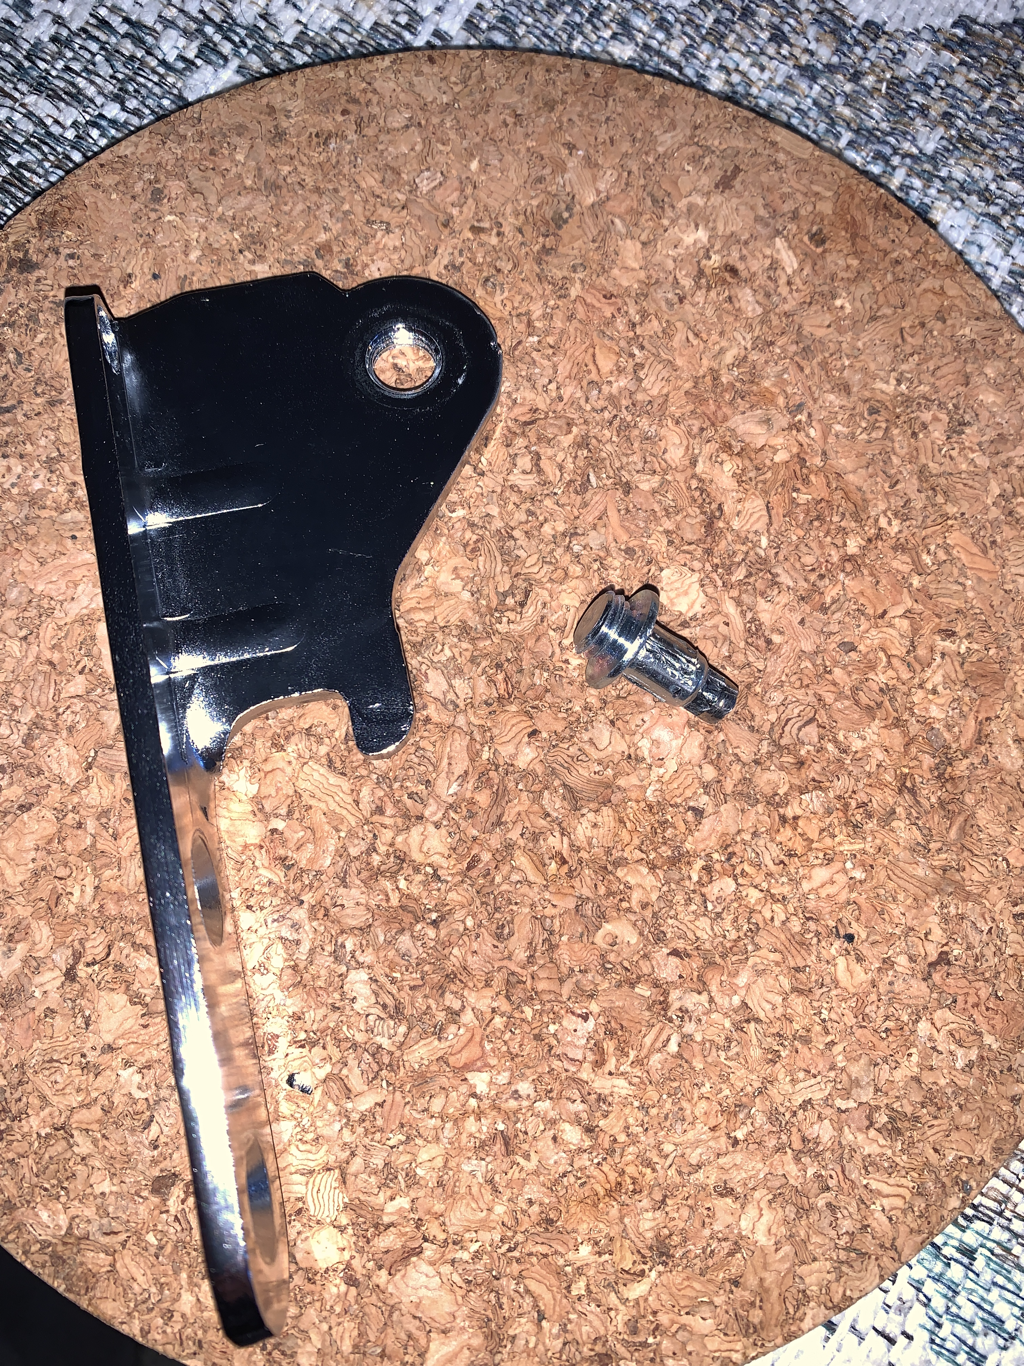 $ uname -a
Linux CGAsync 5.11.0-1022-azure #23~20.04.1-Ubuntu SMP Fri Nov 19 10:20:52 UTC 2021 x86_64 x86_64 x86_64 GNU/Linux $ uname -r 5.11.0-1022-azure $ dpkg --list | egrep -i --color 'linux-image|linux-headers|linux-modules' | awk '{ print $2 }' linux-headers-5.11.0-1021-azure linux-headers-5.11.0-1022-azure linux-headers-5.11.0-1025-azure linux-headers-azure linux-image-5.11.0-1022-azure linux-image-unsigned-5.11.0-1021-azure linux-modules-5.11.0-1021-azure linux-modules-5.11.0-1022-azure $ sudo apt purge linux-headers-5.11.0-1021-azure linux-modules-5.11.0-1021-azure linux-image-unsigned-5.11.0-1021-azure these in red vary. to modify the image you are going to prep you might need these locations and commands Windows 10 desktop shortcuts all users: C:\Users\Public\Public Desktop (hidden) Windows 10 taskbar LayoutModification.xml location: C:\Users\Default\AppData\Local\Microsoft\Windows\Shell Taskbar shortcuts pointing to in the file above: C:\ProgramData\Microsoft\Windows\Start Menu\Programs Zoom 32/64bit MSI installing options: ZoomInstallerFull.msi ZoomAutoupdate=True zNoDesktopShortCut=True ZConfig="EnableSilentAutoUpdate=1" ZConfig="AlwaysCheckLatestVersion=1" to put an existing image in oobe mode, press windows key + R and type
%windir%\system32\sysprep\sysprep.exe /audit /reboot after rebooting, check options "generalize" and "shutdown", delete all existing users from "advanced system settings/profiles" first, and then from "users" with "computer management", and proceed with the commands below: run "disk cleanup" from cmd run: dism /Online /Cleanup-Image /StartComponentCleanup /ResetBase shutdown the vm using the sysprep program, change the boot order to boot from winpe, boot winpe. from diskpart assign A (the disk you will capture from) to the source, and B to the target (the disk where you'll put the .wim on). Note: "B" must be big enough to handle the .wim image (approx 40GB) and to be attached to the vm prior booting from "winpe". small diskpart commands guide: diskpart list disk select disk 0 list part select part 3 assign letter=A select disk 1 create part pri select part 1 format fs=ntfs quick assign letter=B exit run command: dism /Capture-Image /ImageFile:B:\install.wim /CaptureDir:A: /Name:"Win 10 Pro" /Compress:max dnf remove $(rpm -qa | awk '/^kernel/' | grep -v $(uname -r)) The configuration below took me a bit, so I am putting it down to save you the time I spent. You have to have a running Apache2.4 with mod_ssl and, configured SSL certificate in place already. Below is the conversion matrix you need, in order not to get confused. I used LastPass to generate my password, but using anything else is fine. 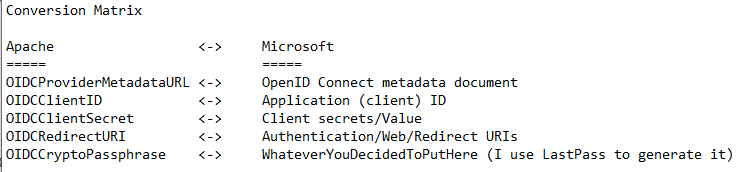 Use yum to install these libraries and mod_auth_openidc yum install jansson hiredis mod_auth_openidc jose Below are my Azure AD parameters followed by my exact working auth_openidc config. It is placed in my "/etc/httpd/conf.d/auth_openidc.conf". The config file, begins with "OIDCProviderMetadataURL" =] 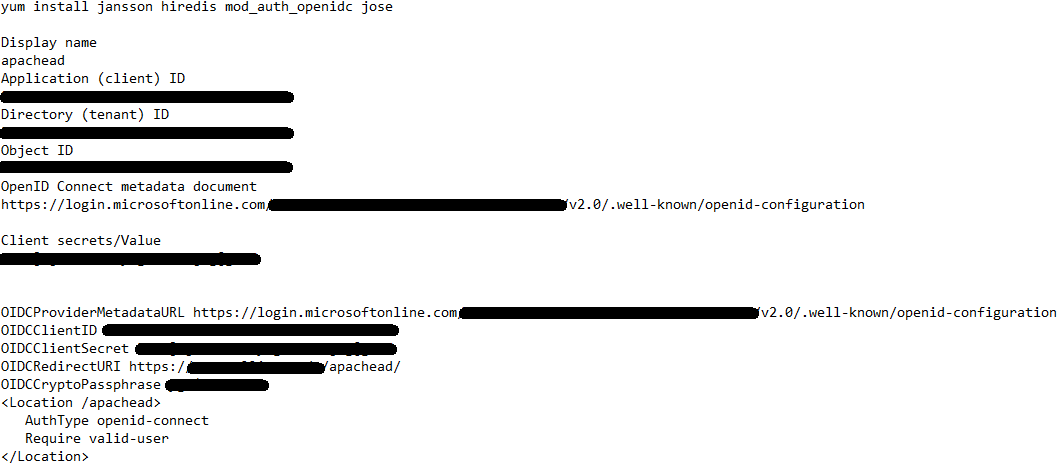 Below is how you add a connector (app registration) 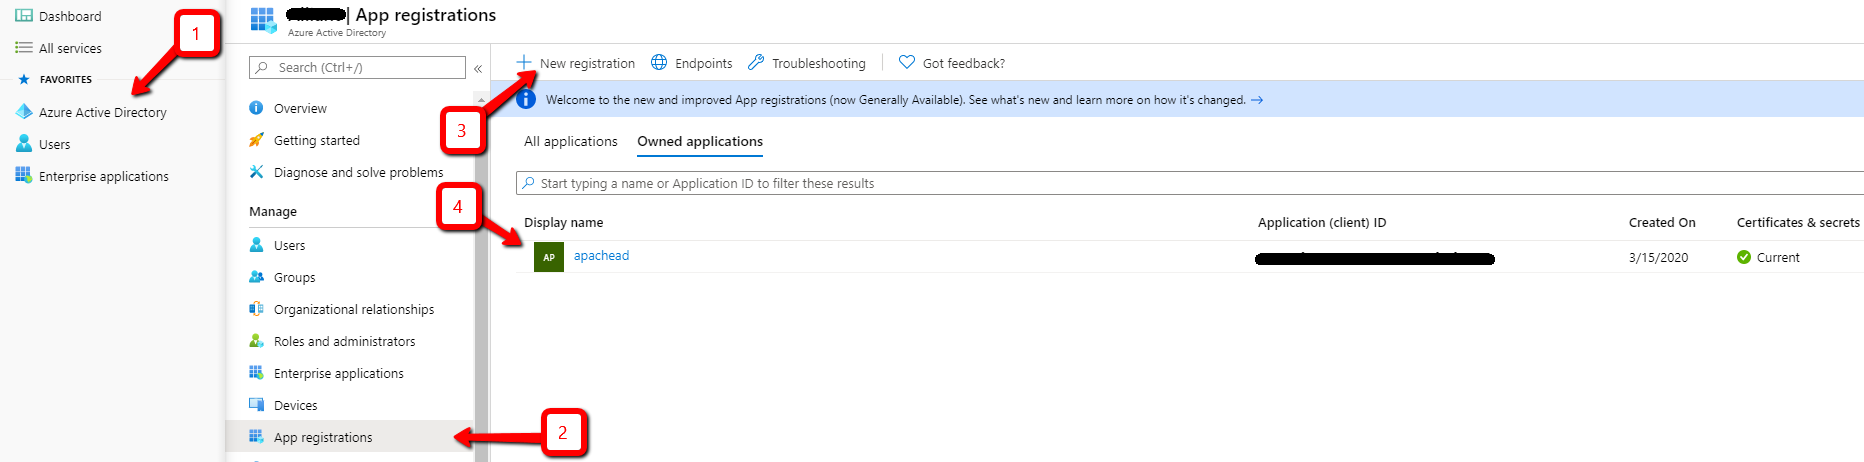 These are the configuration settings in Azure Ad once you add the connector above. 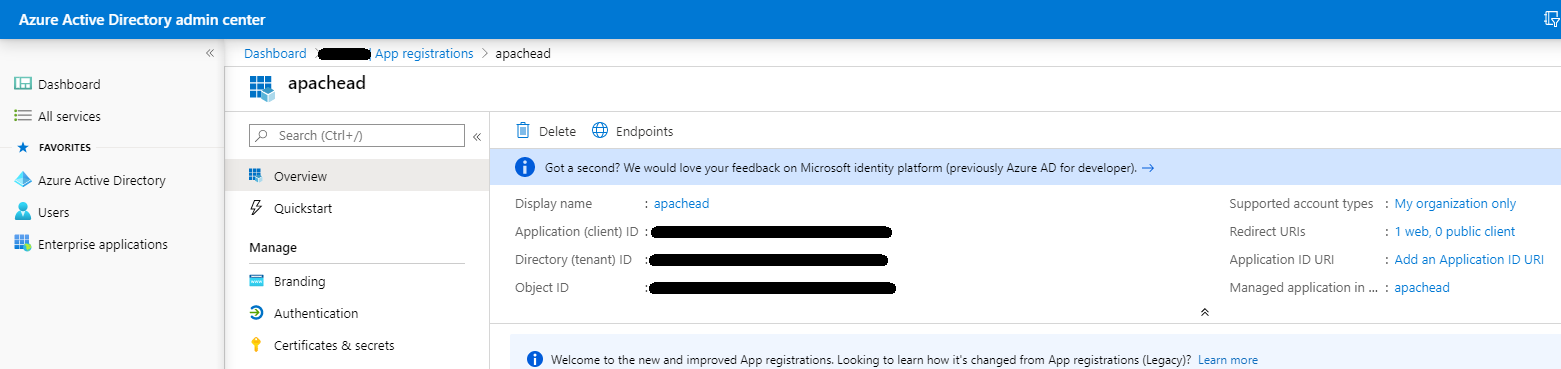 This is how you get all the values you need. Just copy and paste them. 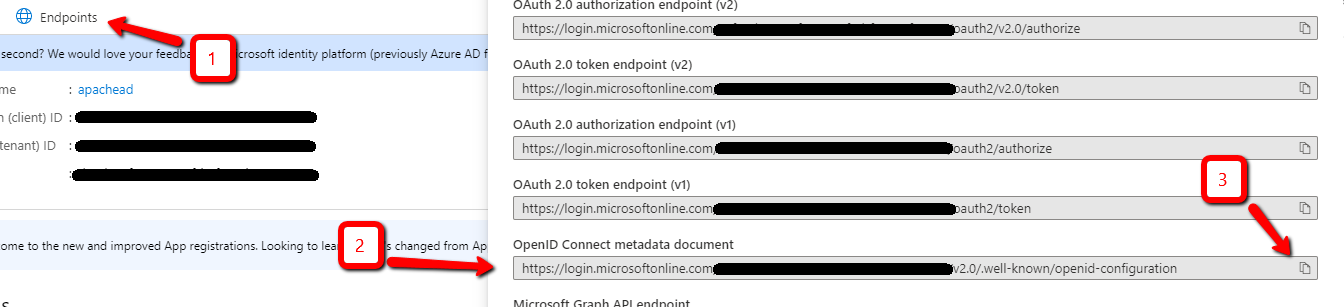 That URI below and the one in the apache configuration have to be the same. 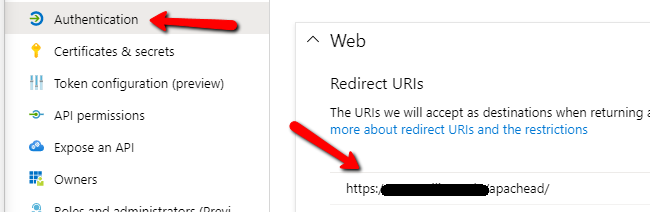 Just add new client secret and Azure AD will generate a password for you, which password you will use in the apache configuration. 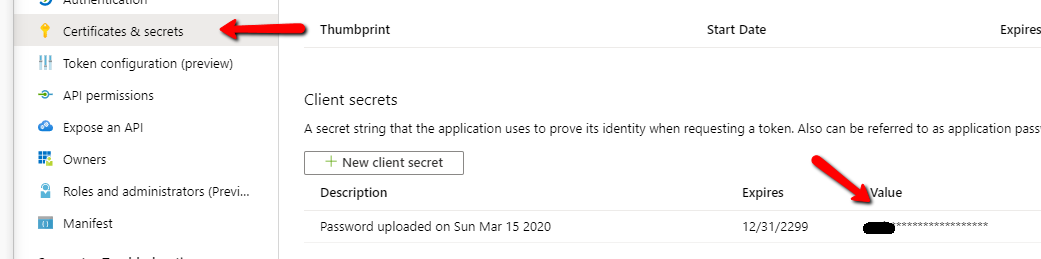 |
AuthorWrite something about yourself. No need to be fancy, just an overview. ArchivesCategories |
 RSS Feed
